How to build a pinhole camera
Bird In Flight has launched the column “Laboratory”, where we will be performing experiments and tests to explore various photography phenomenons. In the first edition we are putting together a pinhole – a homemade camera without lens where the small opening serves as the aperture.
The term “pinhole” was implemented in 1865 by Scottish physicist David Brewster. He was the first to photograph an object in dim sunlight at 10-minute exposure. The scientist shot through pinhole – a homemade camera where a small slit sized less than 0.001 of dime served the role of aperture. In 1960-70-ties, as photomaterials evolved and became more available to the public, pinhole photography gained popularity in Europe and the US.
Usually a pinhole is made out of materials on hand – tin cans, matchboxes and film containers. Anything can be used as the camera body, some even manage to utilize zinc buckets. The camera can be of any shape and form – all you need to do is pick a model or design it yourself.
Pinhole is not the alternative to phone cameras or traditional cameras with interchangeable lens. It can’t be used for commercial projects as the results are rather unpredictable. This is more of a hobby, entertainment, – which doesn’t mean that the images won’t turn out to be interesting. Pinhole-photography fans share their most successful shots on Pinhole website where they also post their thoughts about making the cameras and the shooting process.
Bird In Flight built their own pinhole-device and shot several images through it. To download the complete layout click here.
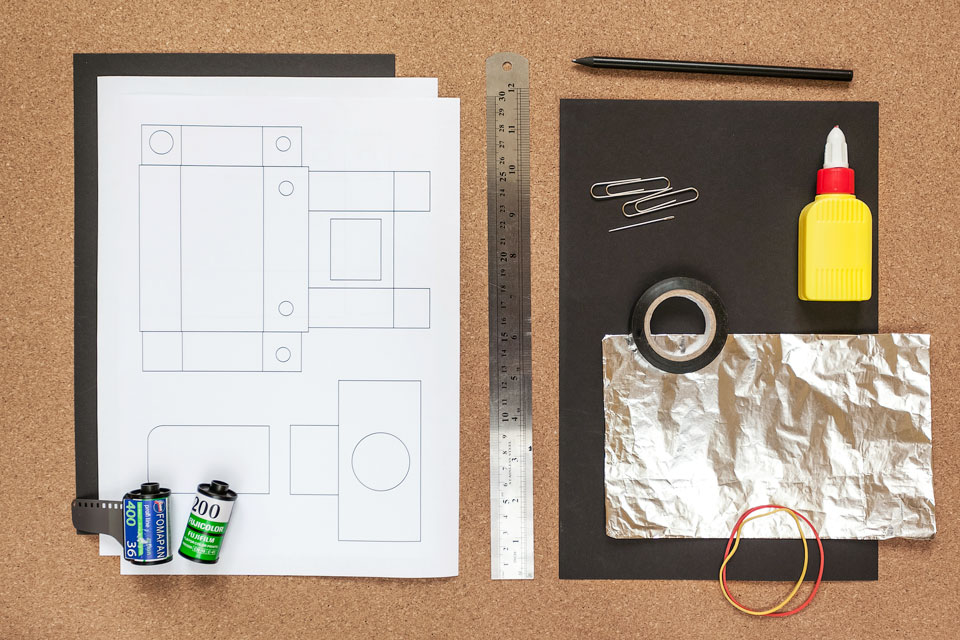
You will need:
Black cardboard, a letter opener or a knife, a ruler, black masking tape, doublesided scotch tape, glue, a sewing needle, two paper clips, a black permanent marker, two 35-mm film rolls – new and used, a small piece of tin or aluminum.
It took us took half an hour. The majority of the time was spent on figuring out the pinhole setup and sketching our own scheme of the body. It’s best to use a metal ruler – unlike a wooden or a plastic one, it can’t be damaged. And it’s best to cut cardboard on a wooden or glass surface.
The layout
Tape the layout to the cardboard using doublesided scotch. Important: it must be matte black, without sheen. Black absorbs the light and doesn’t reflect it onto the film. We used black cardboard purchased at an art supply store. You can use regular cardboard as well if you paint it with black acrylic paint beforehand.

Parts
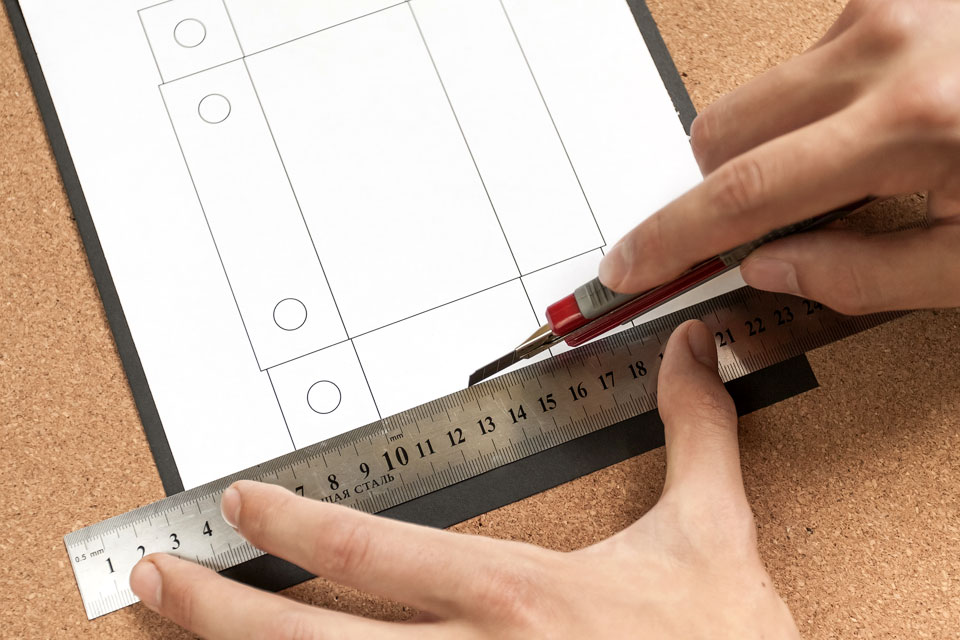
You can cut out parts using scissors, but it’s best to utilize a knife and a liner – you can achieve straighter lines this way, and it’s less time consuming.
Folding
We followed a method used in pattern making. Poked small holes along the folds. Then, applying a ruler, we carefully slid the knife along the fold lines, but without actually cutting the cardboard – the resulting groove (track) allowed us to bend the cardboard easily and accurately.
{
“img”: “/wp-content/uploads/2014/06/pinhole_igla_hole.jpg”,
“alt”: “Съёмка на пинхол-камеру 4”
},
{
“img”: “/wp-content/uploads/2014/06/pinhole_sgibi.jpg”,
“alt”: “Съёмка на пинхол-камеру 5”
}
Round and square openings
You need to cut out several openings – round, to fit the film rolls, and a few square ones. To achieve maximum accuracy we, again, used a needle. We applied it to perforate the lines and followed with a knife, like before.
{
“img”: “/wp-content/uploads/2014/06/pinhole_circle_holes.jpg”,
“alt”: “Съёмка на пинхол-камеру 6”
},
{
“img”: “/wp-content/uploads/2014/06/pinhole_hole_for_lens.jpg”,
“alt”: “Съёмка на пинхол-камеру 7”
}
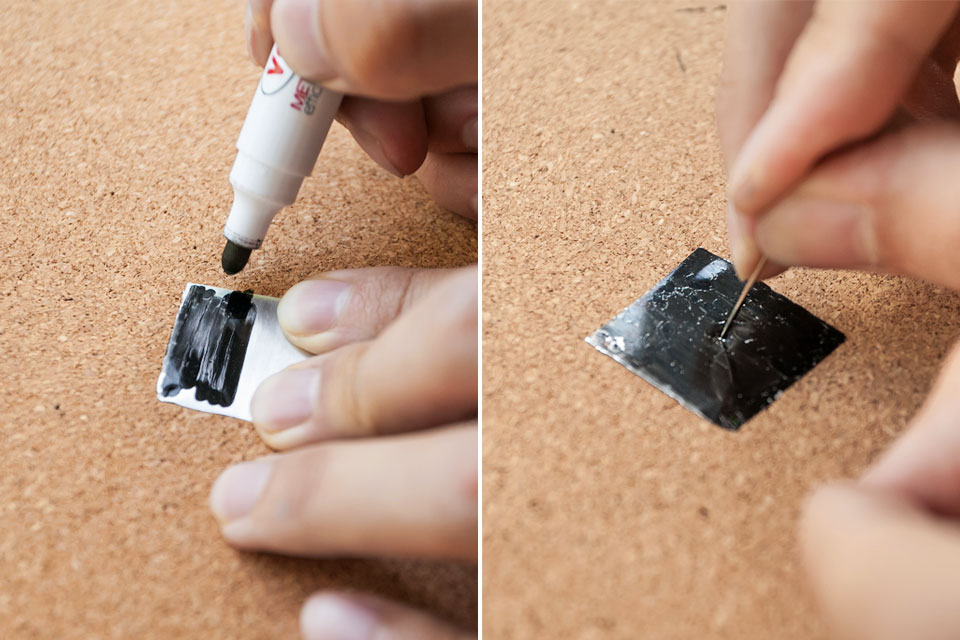
«Aperture»
You can use foil, however tin or a piece of aluminum from a soda can is more convenient to work with. Take a standard can and cut out a 2х2cm square. The inner side needs to be colored black with a permanent marker or acrylic paint. In the center of the square make a small opening with a sewing needle – for the light to reach the film. The distance of the film from the pinhole and the diameter of the pinhole will determine the angle of view and sharpness of your final image. You’ll get the best results if the pinhole is about 1/75 inch in diameter.
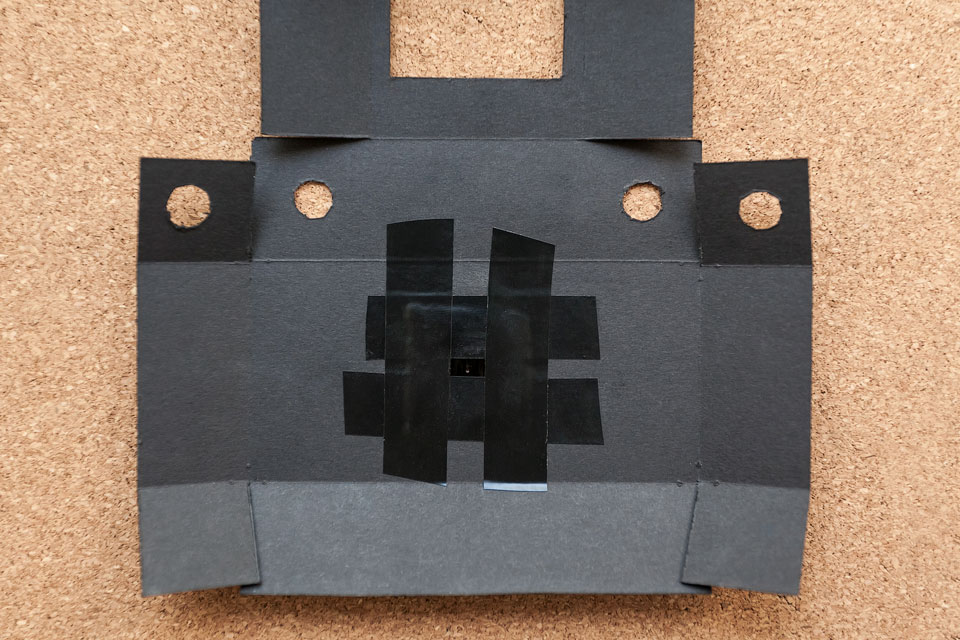
Use black masking or electrical tape to attach “the aperture” to the square opening on the outer side of the box – black side should be facing in (remember, that camera shouldn’t have any reflective surfaces).
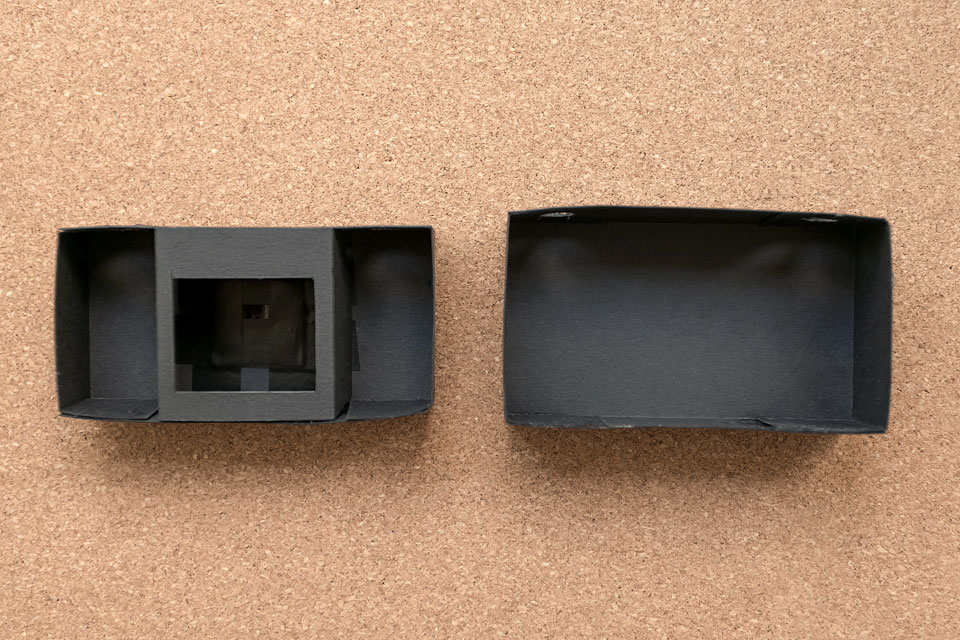
Gluing the parts
We are gluing together parts of the camera body – to end up with two sections of the camera, the front and the back (as shown on the picture). We used “ПВА” glue, but any type of glue will work.
Device for film rewinding
You need two rolls of film – a new and a used one. Cut the ends, then attach them together with scotch tape. Sometimes retrieving film from the old roll cylinder can get complicated. Use tweezers or slightly open the cylinder. Insert the resulting construction into the camera.
{
“img”: “/wp-content/uploads/2014/06/pinhole_obrezaem_kon4ik_plenki.jpg”,
“alt”: “Съёмка на пинхол-камеру 11”
},
{
“img”: “/wp-content/uploads/2014/06/pinhole_sklejka_plyonok.jpg”,
“alt”: “Съёмка на пинхол-камеру 12”
},
{
“img”: “/wp-content/uploads/2014/06/pinhole_zakladyvaem_plyonki.jpg”,
“alt”: “Съёмка на пинхол-камеру 13”
}
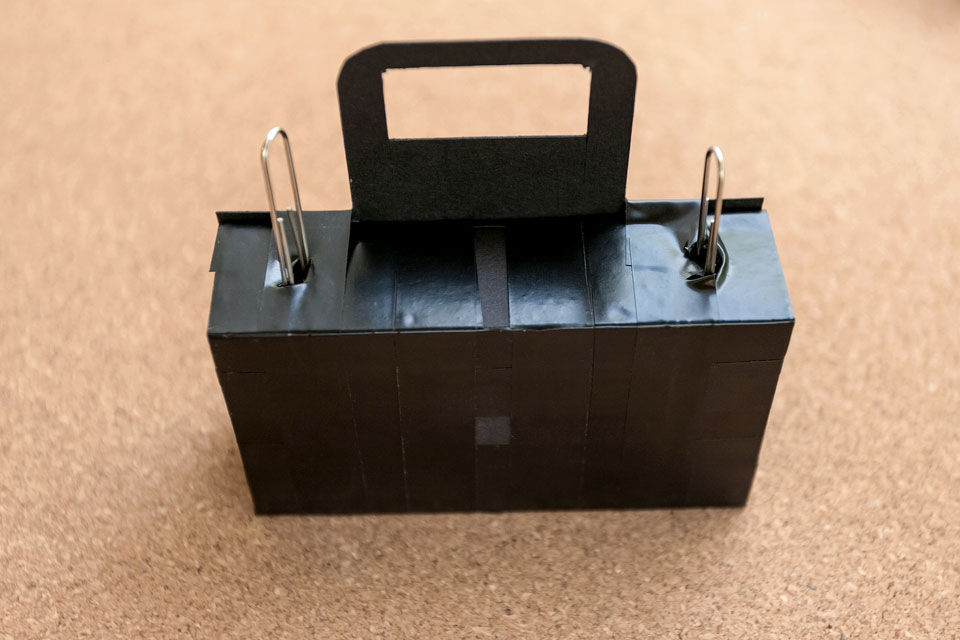
Light isolation
Put the camera together by setting one box inside the other. To make it completely lightproof, wrap the pinhole with black masking tape. Pay attention to the connecting edges as the light can seep through those. At this point you can insert the paper clips into the film rolls – for rewinding purposes.
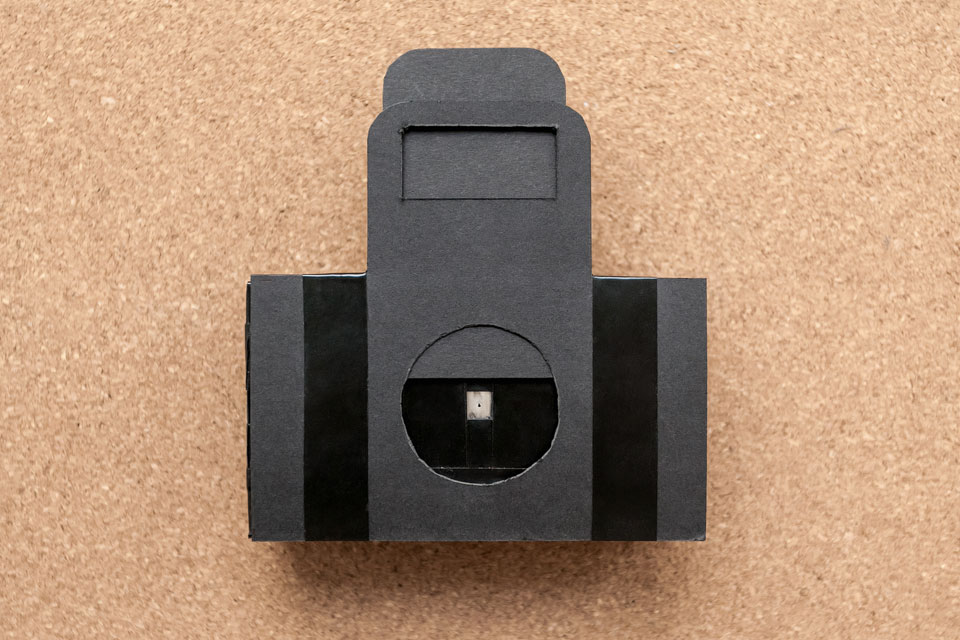
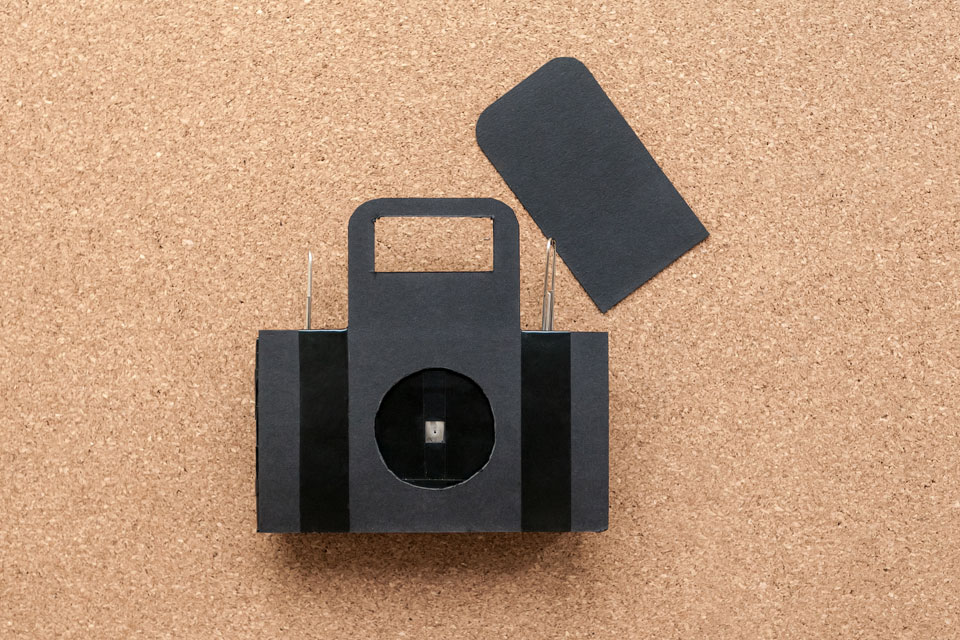
The shutter and the viewfinder
Attach the viewfinder part directly above the pinhole at the front of the camera with tape or rubber bands. The shutter for the camera can be a flap of opaque dark paper hinged with a piece of tape. Use a small piece of tape to hold the shutter closed before and after you take a picture.
The first question everyone asks when it comes to shooting with pinhole – what should the length of exposure be (which means, how long should the shutter be open for to capture the image). There are several calculators out there to determine the correct exposure. We find Pinhole Calc mobile app helpful. On the internet you can use website Mrpinhole.com.
Each length of exposure calculator will require you to input focus distance. In this case it’s the distance between the “aperture” and the film, which is the thickness of the camera body.
The viewfinder of a pinhole camera is very relative which makes determining the limits of the shot difficult. Nevertheless it does help control positioning of the image during the shoot – allowing to see vertical and horizontal lines and the approximate center of the image.
Some people install a device for counting images. We decided not to – as we figured that one shot is two twists of the paper clip attached to the film roll. When it comes to pinhole, it’s best to finish the film as fast as you can so forgetting the number of shots shouldn’t be a problem.
{
“img”: “/wp-content/uploads/2014/06/pinhole-5.jpg”,
“alt”: “Съёмка на пинхол-камеру 11”
},
{
“img”: “/wp-content/uploads/2014/06/pinhole-6.jpg”,
“alt”: “Съёмка на пинхол-камеру 12”
},
{
“img”: “/wp-content/uploads/2014/06/pinhole-7.jpg”,
“alt”: “Съёмка на пинхол-камеру 13”
},
{
“img”: “/wp-content/uploads/2014/06/pinhole-21.jpg”,
“alt”: “Съёмка на пинхол-камеру 12”
},
{
“img”: “/wp-content/uploads/2014/06/pinhole-31.jpg”,
“alt”: “Съёмка на пинхол-камеру 12”
},
{
“img”: “/wp-content/uploads/2014/06/pinhole-41.jpg”,
“alt”: “Съёмка на пинхол-камеру 12”
},
{
“img”: “/wp-content/uploads/2014/06/pinhole-cover_21.jpg”,
“alt”: “Съёмка на пинхол-камеру 12”
}
New and best